
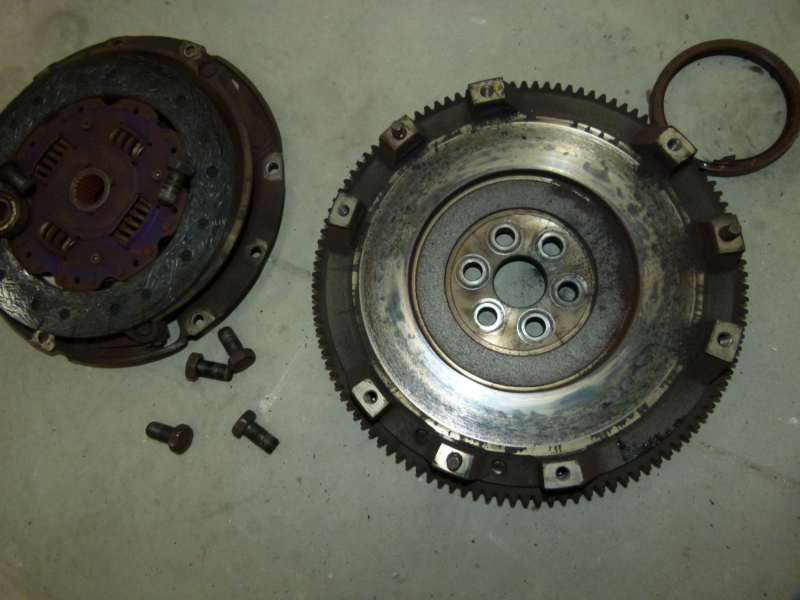
It was time to move on to the drivetrain of this roadster. With 150,000 plus miles on the clutch I really didn’t want to trust it to a track session or two before I replaced it. With a little Internet searching I came across a good deal on an Exedy clutch kit and a lightweight chrommoly flywheel that was about seven pounds lighter than stock. The Exedy clutch kit included the pressure plate and disc as well as a new pilot bearing and throw out bearing. The only thing I added was a set of ARP flywheel to crankshaft bolts.
Miata.net has plenty of good information on performing a flywheel and clutch replacement so I won’t bother repeating all the details involved. I did spend some time disconnecting the transmission from the power frame and removed the 11 bolts that hold it to the motor. The clutch slave cylinder is held to the transmission with a couple of bolts that were also removed. With the help of a transmission jack which I secured it to with some bungy cords I was able to get the tranny unhooked and off the engine.
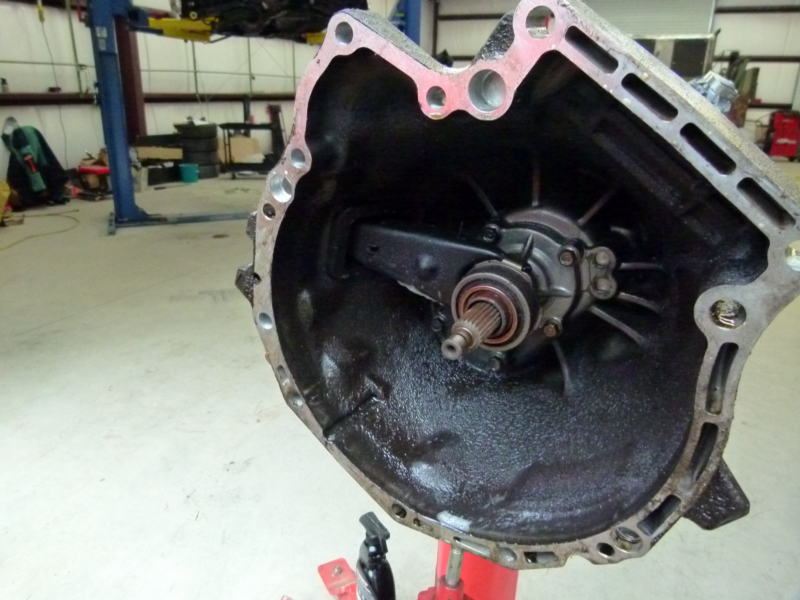
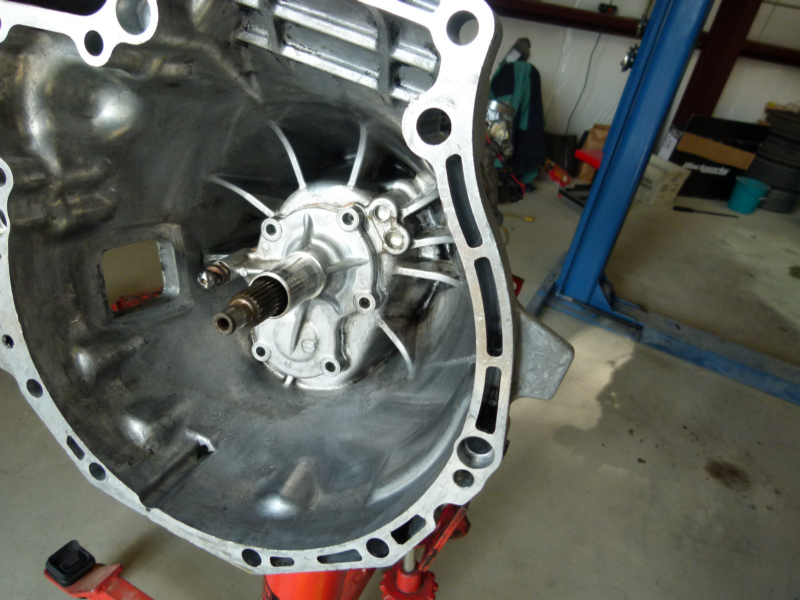
It was a black mess of old oil and clutch dust in the bell housing. The pilot bearing fell right out onto the shop floor. It was dry as the desert. I cleaned up the back of the engine and then used a puller to remove the rear main seal, which was also pretty hard and brittle. I had a new one of those that I oiled up and inserted in its place.

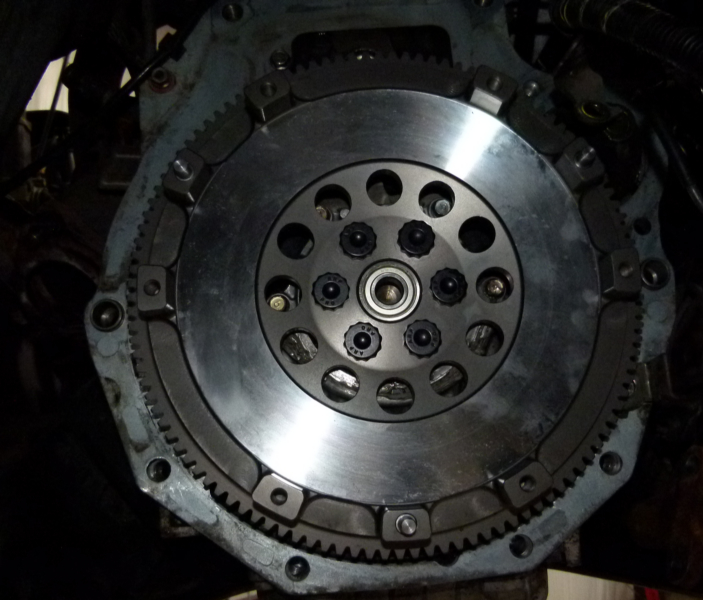
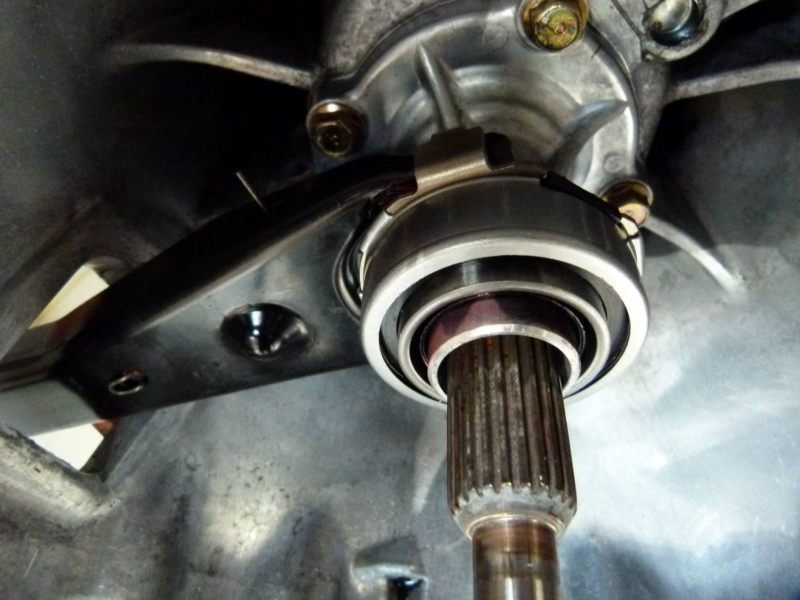
The new flywheel matched up perfectly to the crankshaft and I secured it with the ARP flywheel bolts after coating the threads with some blue Loctite. I have a flywheel holder that engages the teeth of the flywheel so I used that to hold it from turning while I used a torque wrench to apply the proper amount to the bolts.
Next I cleaned the flywheel’s surface with a paper towel and brake cleaner. I had previously set the pilot bearing into the flywheel. The kit came with an alignment tool so I set the friction disk in place using the tool. Next I cleaned the surface of the pressure plate and set it on the dowels of the flywheel. The kit also came with a set of new bolts whose threads I also coated with blue Loctite.
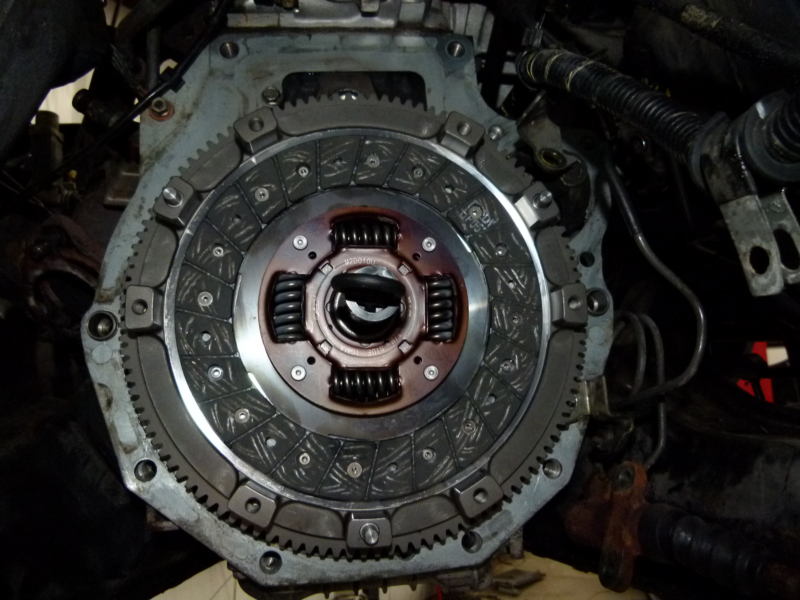

I took my time and slowly brought the tension down on the pressure plate with the bolts alternating around so it would occur evenly. These bolts were finally tightened down with a torque wrench. Everything looked as it should and I turned my attention to the dirty transmission.
Mark was good enough to help me set it on a couple of wooden horses so that I could alternately spray with Purple Power, scrub with a brush, and rinse off with water from a pressure nozzle.
It took a lot of time and cleaner, but eventually the transmission was clean and ready for the next steps.

It was brought back to the shop and secured to the tranny jack where I was able to remove the input shaft casting. that gave me access to the old seal which I removed and replaced with a nice new one. The throwout bearing arm was cleaned up, coated with high temperature grease in the appropriate places and reinstalled.
Next the tail shaft seal was removed and replaced with a new one. All these seals had done their duty and needed to be refreshed. Later, when the timing belt and water pump is replaced the crank seal will also be replaced.

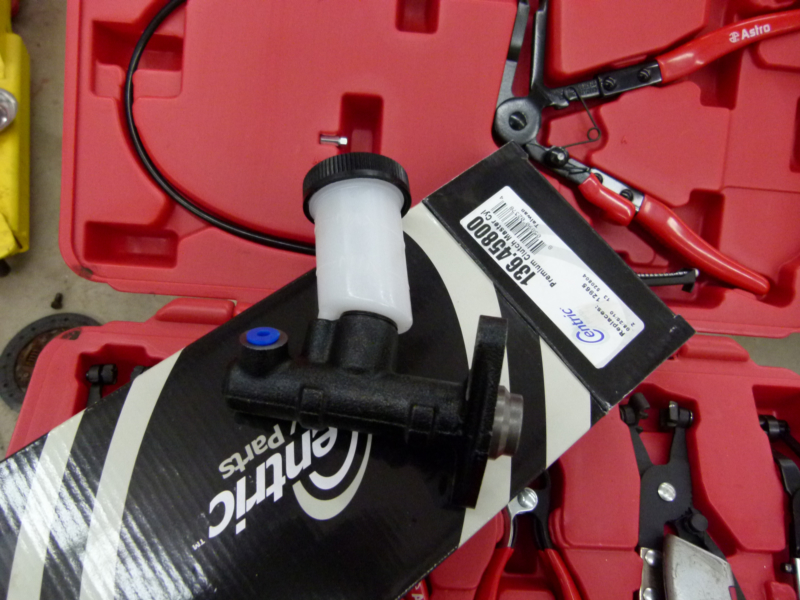
While looking around at the frame where the slave cylinder for the clutch was positioned I saw that there was missing paint and instead had some some rust, which was a clear sign that the slave cylinder had been leaking. I decided to replace it and the clutch master cylinder as well. I also had a new braided stainless steel flexible clutch line to replace the original flex hose.

While I was under the hood changing things I put in a new master cylinder for the brakes as well.
All this is not overkill. With the miles and age of this car I knew that I had better do this now rather than finding out the hard way when a failure might occur on the track.

With all that going on it was time to replace the motor mounts. I had picked up a set of heavy duty Megan Racing mounts to replace the stock mounts with.

Its more than a little tough to take out the old ones since, at that point, the two mounts were the only thing that held the engine in place. I worked on one side at a time, getting the nuts and bolts loose and then prying up that side of the block so I could wiggle out the mount assembly and place a rubber hammer handle to hold things up temporarily.
I took apart the motor mount assembly and cleaned things up before I put it all back together with the new mount in place. One side in and then repeat for the other side. Whew.
The next day I had some help to put the transmission back in place.


Leave a comment