
For those of you that have forgotten – the Miata is a convertible. It is a two-seater, front-engined, rear-wheel-drive roadster. And as such it has an inherent weakness of most convertibles and that is a flexible chassis.
But there is a solution.
The Hard Dog roll bar and door bars certainly improved things but we didn’t stop there. Adding rigidity to a chassis pays off in dividends. It assists in more predictable weight transfer and more meaningful alignment settings as they are not as apt to flex into an undesireable alignment. From the driver’s seat making a chassis more rigid imparts more joy into the experience of driving with spirit.
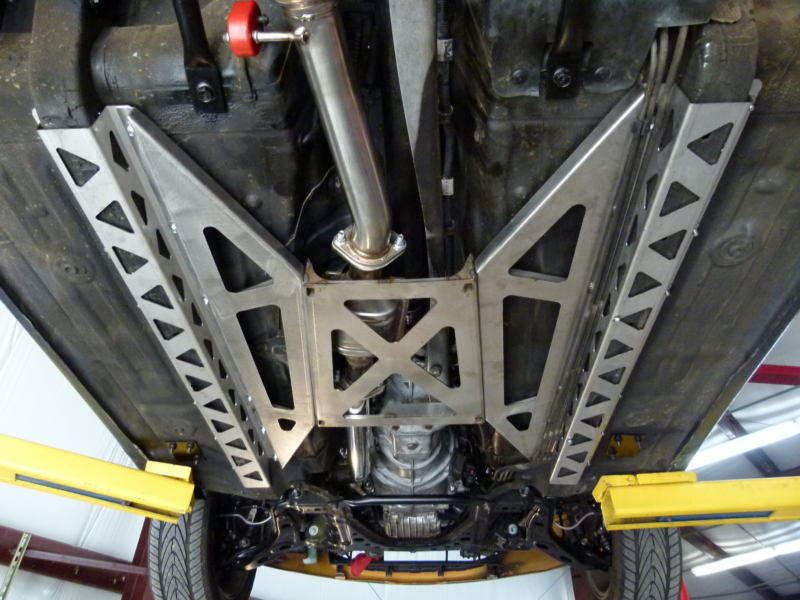
The folks at Flyin’ Miata have developed a set of stainless steel frame rail reinforcements that, on their own, provide excellent chassis stiffness. Not stopping there, the folks at Flyin’ Miata have added additional bracing in between the rails that together comprise what they call the Butterfly Brace.
This set of stainless steel segments are bolted to the car’s frame and to each other and form bracing that not only improves chassis flex, but torsional stiffness.
So yesterday Bennett (a volunteer) and I worked to get the complete Butterfly Brace installed. First off the existing frame rails had the typical amount of deformation that is usually found from years of metal flex and encounters with people using floor jacks in ways the factory rails were never intended to perform. In this state the frame rails would not allow the reenforcement rails to be slid over them. Out came a large ball peen hammer that was used to massage the factory frame rails back into acceptable shape. On the passenger side this had to be done carefully as there are four rows of steel tubing mounted to the inside of the factory rail that consist of fuel and brake lines.
Once the dimensions were corrected the new rail supports were slipped into place. It is important to get them slid as far forward as is possible while still keeping them flat against the floor. Too far back and holes that are drilled will end up in places you don’t want them and cannot reach with bolts. It is also important to keep the rails even side to side so that one rail isn’t more forward than the other. This will make it much easier to connect the inner portions of the bracing together later.
Nuts bolts and washers are supplied, of course. You do have to supply your own drill.
Bennett stayed in the car’s cabin while the car was elevated on the rack so I could position the rails and drill holes for the bolts. The first couple of bolts were installed just to hold the new brace in place so that future holes drilled would continue to line up properly.
When doing this job it is important to keep a good communication going with your help as you don’t want to put a drill through anyones foot. As holes are made Bennett would insert a bolt and hold the head with a wrench while I tightened the nuts and washers up from below.

When we moved to the passenger side rail Bennett had to dismount the ECU and other computer so that I didn’t drill through them.
We kept the bolts loose on the inner side of the rail as the section of the brace would need to move when the center section was bolted up and adjusted for height.

The passenger side also required care and careful repositioning of the fuel/brake lines. The factory mounting brackets were modified so they could be remounted to the new stainless steel rails. When it was all done the braces were adjusted to maximise clearance and then their mounting bolts were all tightened in place.
This new structure provides a fantastic amount of much appreciated rigidity to the chassis.
But we were not done!
Next we worked on removing the front fenders. Flyin’ Miata sells additional bracing known as Frog Arms that bolt on underneath the front fenders. I had used similar bracing behind the front fenders on my Evolution with excellent results and didn’t hesitate to install this set on the Miata.

Removing the front fenders takes a lot of patience as many bolts and scrivets (plastic screw/rivets) had to be removed from many different places, including from behind the front bumper cover. When everything was finally loose, the fender was pulled off and a large pile of leaves and dirt fell onto the garage floor. Just in front of the door is a spot behind the fender that collects debris like a magnet. Leaves, dirt and whatever, were liberated from the cavity. The inside of the fender was checked for rust and spray-on rust converter was applied where appropriate.
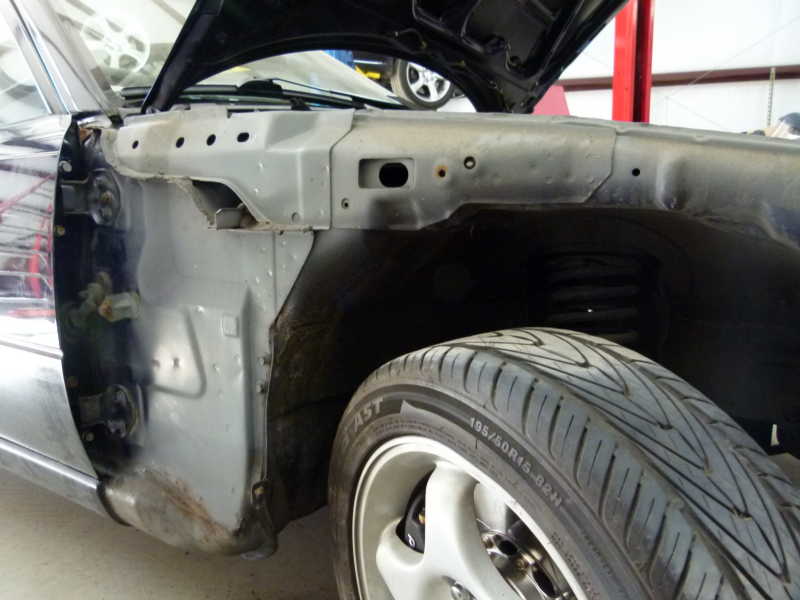
Three of the door hinge bolts were removed after carefully marking the positions with a Sharpie. When doing this the car doors always stayed shut, but it is a good idea to mark the hinge position in any case. Then the bright green Frog Arm was set in place.

This brace makes use of, not only the hinge bolts, but a couple of bolt locations by the wheel as well as a spot at the top edge of the fender where a new hole is drilled. New bolts for the hinges are supplied along with new bolts for the other spots. Everything lined up quite nicely with only a minor adjustment on the bottom hinge bolt slot on the passenger side.
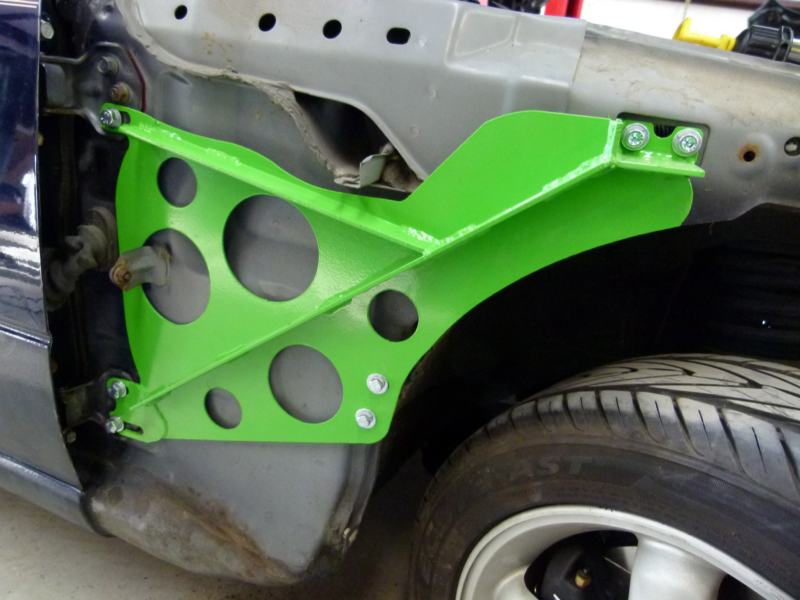
With both sides bolted in place and the fasteners snugged down properly the fenders were mounted back in place. Hidden from direct view these braces will pay dividends in chassis stiffness.

Leave a reply to Fox Chassis Stiffening – Ford Mustang Forums : Corral.net Mustang Forum Cancel reply